The following instructions will guide you through the CSR generation process on Microsoft Exchange 2019. To learn more about CSRs and the importance of your private key, reference our Overview of Certificate Signing Request article. If you already generated the CSR and received your trusted SSL certificate, reference our Exchange 2019 SSL Installation Instructions and disregard the steps below.
1. Login to Exchange Admin Center (EAC)
Use a web browser to navigate to the URL of your server, for example:
https://localhost/ecp
On the EAC login page, enter your domain\username and password, then click Sign in.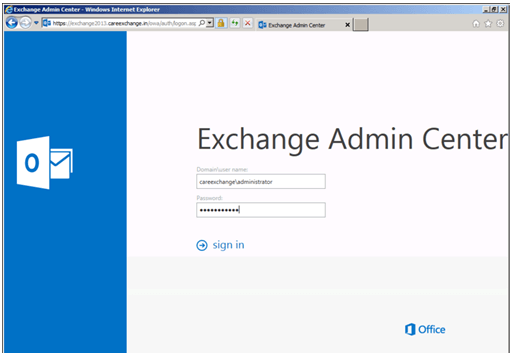
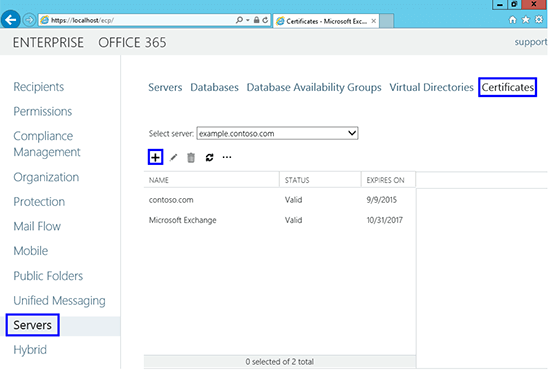
2. Navigate to “Certificates”
In EAC, on the left-hand sidebar, click Servers, then on the top menu click Certificates.
On the Certificates page, use the Select server dropdown to choose your Exchange 2019 server, then click the + symbol.
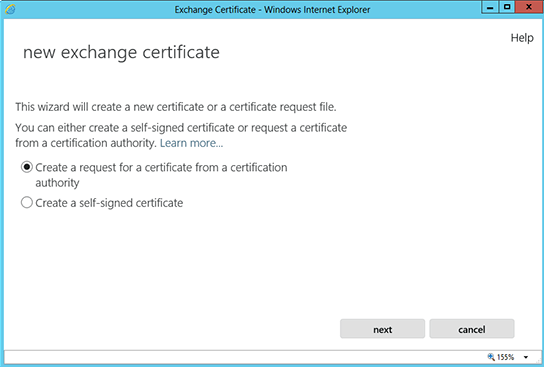
3. Create New Request
In the New Exchange certificate wizard, select Create a request for a certificate from a certification authority, then click Next.
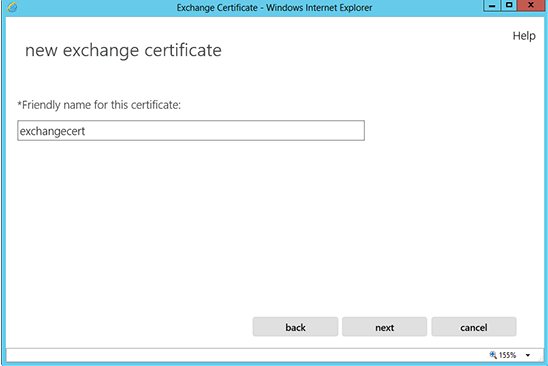
4. Enter Friendly Name
Type a friendly name for this certificate (for example, “BoloBlast Exchange 2019 SAN”). The friendly name is for your reference only and isn’t included in the certificate. Click Next.
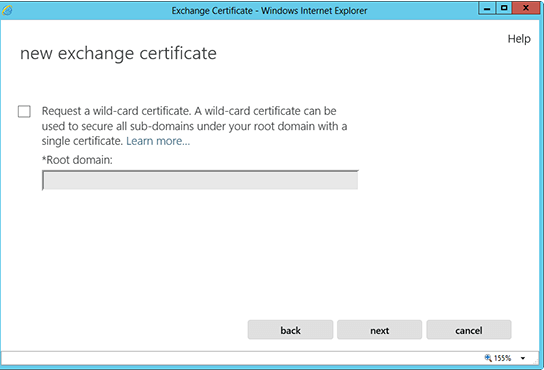
5. Indicate if Certificate Is Wildcard
If you are generating a wildcard CSR, check Request a wildcard certificate and enter the root domain (e.g. *.yourdomain.com), then click Next. Otherwise, leave this unchecked and click Next.
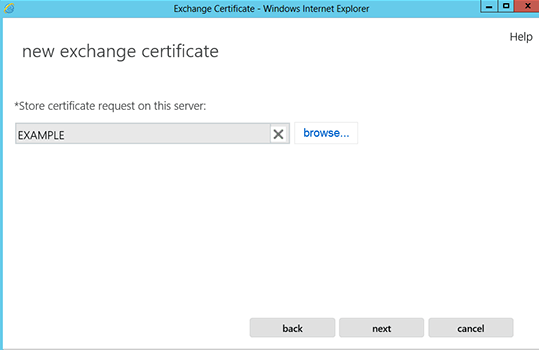
6. Select Server to Save Request Onto
Choose Store the certificate request on this server, click Browse, select a folder (for example C:\CertReqs\exchange2019.req), then click Next.
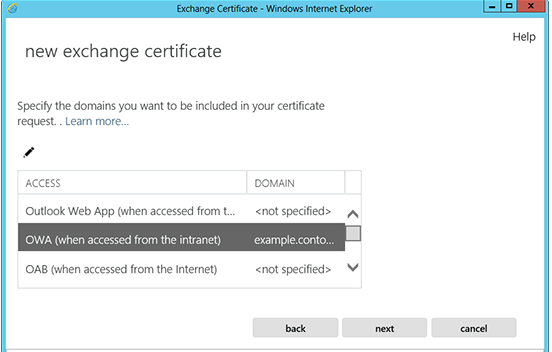
7. Specify Domains
On the Domains page:
- Add your primary hostname (Common Name), e.g. mail.yourdomain.com
- Click + to add each additional SAN, e.g. autodiscover.yourdomain.com, owa.yourdomain.com
Click Next, review the list, click Next again.
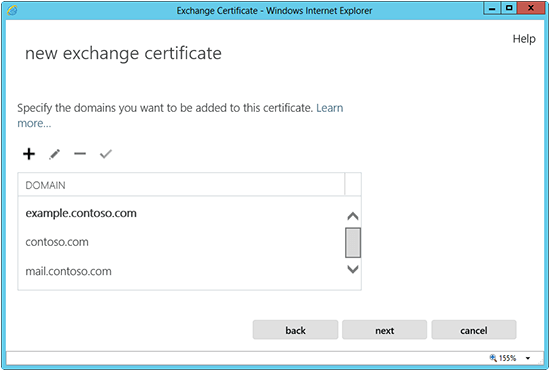
Note: You can skip this step if you are using a Wildcard Certificate.
Review the list of names that Exchange 2013 recommends using in your CSR and click Next. You can add, edit, or delete the names by using the +, – features provided.
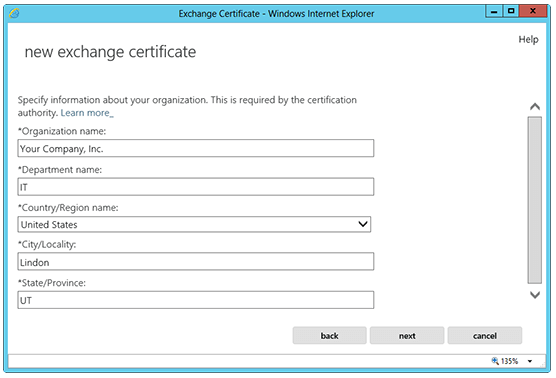
8. Enter the CSR Details
Fill out your organization information:
- Organization name: Your company’s registered name (e.g. BoloBlast Marketing Pvt. Limited)
- Department: Your department (e.g. IT)
- City/locality: e.g. Karachi
- State/province: e.g. Sindh (no abbreviations)
- Country: Select your country (e.g. PK)
Click Next.
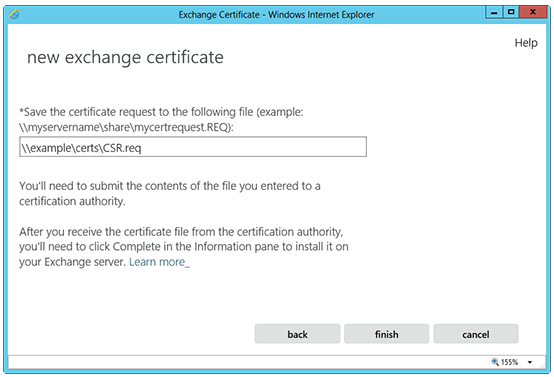
9. Save the CSR
Confirm the file path shown (e.g. C:\CertReqs\exchange2019.req) and click Finish. The CSR file is now created at that location.
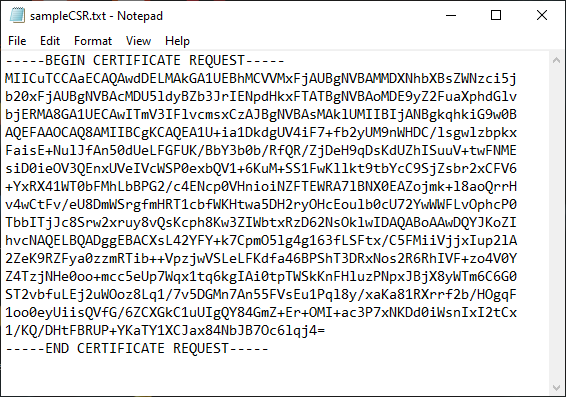
10. Submit Your CSR to BoloBlast SSL Team
-----BEGIN CERTIFICATE REQUEST-----
…
-----END CERTIFICATE REQUEST-----
This is how you can generate a CSR for Microsoft Exchange 2019. For any questions or assistance, reach out to [email protected].